Home

Wednesday, December 21, 2011

Christmas Tree Skirt

Oh, Pinterest.  You're dumbing down the crafty American woman.  No need for original ideas, folks...just hop on over to your newest addiction.  Within minutes you will literally have ideas dripping out of your ears.  Which is gross.  And expensive when you find yourself in JoAnn's buying three cart loads of supplies. 

My latest?  A tree skirt, of course!  My plain-o green skirt from Wal-Mart simply won't do (even though it will be completely covered by presents).  Pinterest boasts beautiful, home-made tree skirts around every corner...and I caved. 

This was an almost free project for me since I already had aforementioned tree skirt and some fabric - a brand new white curtain from Ikea that my dog mangled before I could ever hang it up.  I just cut around the less than desireable parts and had more than enough fabric for my newest time-wasting, but holiday-cheer-inducing project.  (Do you like the way I just glossed right over the dog mangling part?  It's like I didn't even get furious and cry and beat my head against the coffee table wondering why we ever got a dog...why our dog would purposefully ruin my life...)

Here's what we started out with.

Looks like it's seen better days.  And I'm pretty sure it started out ugly, but I know for a fact it was cheeeeap.

Next step, have your friend cut out lots of three inch strips of fabric.  If you don't have a friend willing to do this....I'm sorry.  You can't have mine.  Then who would cut my fabric?  Jamie is amazing.  And she made a tree skirt as well...check it out.  

If you don't happen to have a pair of dog-eaten white curtains handy, you'll need about four yards of fabric.  The lighter-weight the fabric, the easier it is to glue.  I suppose you could make the strips wider and do fewer of them, but I did three inch strips...the longer the better (for less starting and stopping during the glueing process).

Next, start glueing!  I started about an inch from the edge of my tree skirt, buuut I later decided to add some tan-ish muslin fabric to my skirt, so I made another layer about a quarter of an inch from the edge.  Anyhoo, just lay down a line of glue, and start pinching the fabric together to make a ruffle.  The bigger your ruffles, the longer it will take and the more fabric you will use. 


Apparently I could not be bothered to brush off my filthy tree skirt....

At the ends, just wrap your fabric around the back and glue.

Once you're made it all the way around (which will seem like forever), start on your next row...you'll get faster!

I kept all my rows about an inch apart. 


About half way through I stopped.  Bad idea.  It took me a full week to get back into it.  I moved it to the table...which proved to be much easier on the ol' back, and kept plugging away.  I ended up adding that first row of muslin (I figured it would hide dirt a little better) then I added a row of muslin after every fourth row of white.  Kinda randomly chose than number, but it ended up working perfectly.


When I finally finished it, I flipped it over and glued three sets of 12" ribbon on to the back to close it.


Flipped it back over, and shazaam!  Done! 


You can see it in her eyes...I ordered her to lay down in front of the tree and be cute.

So what do you think?  Had any Pinterest-inspired projects lately?  Or perhaps I should ask...any projects that you actually came up with your own brain power?  Kudos to you.  I think a brain surgeon would find a big ol' red and white "P" in my noggin these days.

Monday, December 19, 2011

Christmas Garland

I can see you.  Sitting there.  Twiddling your thumbs.  Wondering why I'm doing another pom-pom craft.  Wondering if pom-pom is spelled correctly (I googled it.  Martha Stewart spells it pom-pom...as opposed to pom pom, pom-pon, or pompom, sooooo we're going with that one).  Wondering if pom-poms are for everyone.

Well I'll tell you!  There are!  Go make one (or eighty).  You'll thank me. 

Christmas garland is on the agenda today.  Apparently (according to Pinterest) garland is the thing to do these days.  I thought about pinecones and felt balls and ornaments, then of course, I came back to my favorite...little fluffy pom-poms (plus I already had yarn).  Now if you recall, I went through this process with my pom-pom flowers, but I'm going to share again.  Just because it's that much fun.  Here we go.
 
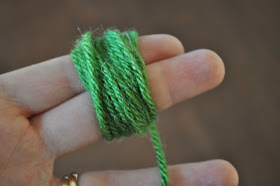
Start by wrapping yarn around your fingers.  I was going for pretty small pom-poms for this project, so I used two fingers and only wrapped them twenty-five times.


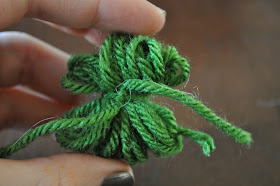
Slide your little yarn conglomeration of your fingers, and cut a threeish inch length of yarn to tie around the middle.


Like the way I switched up the colors on ya there?  Ok. Now cut the loops.

It's gonna look a little wonky at first.


Just fluff 'er up and trim the long strings until you have a roundish shape.  Some of mine are more "ish" than round, but that's something we can all buck up and get past, I believe.

Next up, make them into a garland!  I would think there are myriads of different ways to accomplish this, but I decided to use twine and a big fat needle.  I found these at JoAnn's.

It's pretty important that you get the "European Quality".  Nobody wants to get stuck with "Midwestern American Quality" or "Tanzanian Quality". 

Here's my twine.  No it's not your eyes.  It's a blurry picture.  The extreme fanciness of my camera overwhelms me at times.

You guessed it.  Time to spear some pom-poms.


Final step:  Start pom-pom-ing your abode!


I did have that garland on the fireplace swagged (surely I didn't use that correctly...) in the middle, but apparently I need to find a better swagger than scotch tape...
So how 'bout it?  Have I won over any pom-pom skeptics?  Also, yes.  Those flowers on my coffee table are absolutely dead.

Weekend Happenings

We did all kinds of fantastically magical things this weekend....however, I seem to have only taken my camera to one of them.  Also, it's hard to really capture the fantasticality of Anthony's work Christmas party.  Or a mid-Saturday morning choir rehearsal for Sunday's cantata.  Or our fully awesome Sunday School party (complete with Jim N' Nicks PLUS everybody-bring-your-most-tasty-and-fattening-dessert-or-side-dish) Sunday night after church. It will have to suffice to say that fun was had by all.

The one event I did manage to capture was our escapade downtown to see White Christmas at the Alabama Theatre.  This.  Was.  Amazing.  Way more festive than watching it in your living room.


If I may say a word...  This guy was tearing up the organ.  He was pretty amazing.  AND the organ came up from the floor.  What's better than "Here Comes Santa Clause" being played on a sweet organ coming out of the floor.  Not much, I can tell ya that right now.


The theatre was built in the twenties, and renovated about fifteen years ago.  The detail was incredible.


Super enjoyable.  Super Christmasy.  Super.  Duper.

Thursday, December 15, 2011

Eeeeeeeeeek!!!

I'm pretty sure that's the excited little sound I heard coming from my mailbox the day I announced "I have GOT to do something about that ridiculous mailbox!"  We have lived in this house for over a year, and this is what our mailbox looked like until recently.


It's hard to say whether I pixelated our house number because I'm worried about a stalker coming to steal all of our inexpensive stuff, or whether I just discovered the pixelate feature on Picnik.

Now, if you'll notice, there are a few things wrong with this mailbox.  First of all it was even uglier than it looks in these pictures, in person.  Also, our last name isn't Curry (although if it WAS Curry, I would hope that people would constantly be trying to take us out for Indian food just because of the irony.  That would be awesome.)  My third and final observation is that this mailbox is firmly cemented into a brick...thing.  There's no way we were going to just pop that sucker out and put in a new one.  And Anthony wasn't digging the whole, "Let's just take a sledgehammer to it" idea.  So we just left it sitting in all its ugliness.  For a year.  Plus a few months.

One fine day I trotted out to the mailbox with a piece of sandpaper and a razor blade.  In about two minutes I had un-Curried our mailbox.


Boy howdy.  I should have done THAT a long time ago.  Then I whipped out my trusty drop cloth and some painter's tape.


THEN I took my oil rubbed bronze spray paint and applied lots of thin, even coats.


Here it is a few coats in...

Did I mention it takes several coats...  But I certainly didn't want paint dripping down the front of my mailbox, now did I?  Here she is almost done.

Next up, re-numbering and lettering her.  I really kind of hated the only options at Home Depot and Lowe's, so I decided to just try scrap booking stickers.  Bad idea?  Probably.  But wait!  There's more!  After I got the stickers on, I let 'em have it with some lacquer.


And it seems to have worked magnificently!


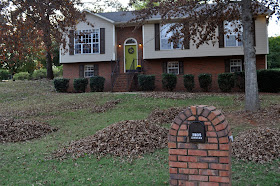
I love it!  I also love the progression of the leaves in the background.  So what do you think?  Any friendly wagers on how long until my not-so-outdoor-safe stickers will last?  Or how long I will be able to stand those awful bushes before I pull them out of the ground?